Understanding Your D-ILA Projector
Unveiling the D-ILA Technology
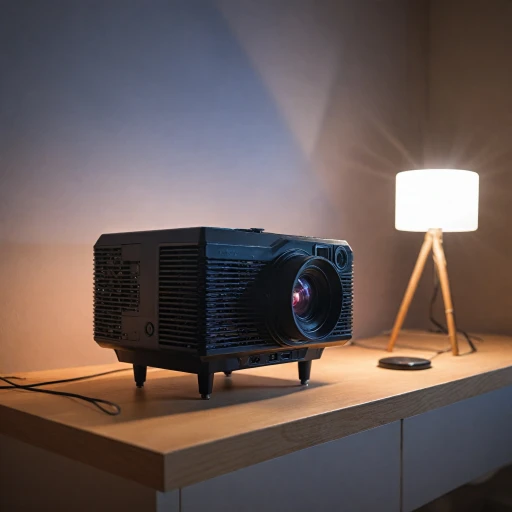
If you're diving into the world of home theater projectors, JVC's D-ILA technology stands out with its remarkable performance. Known for delivering exceptional picture quality, D-ILA, a type of LCoS (liquid crystal on silicon) technology, provides vibrant color reproduction and impressive contrast ratios. Unlike traditional lamp projectors, a D-ILA projector focuses on delivering a smoother, cinema-like experience by minimizing light diffraction and pixelation.Spotlight on JVC's Engineering
JVC, a renowned player in the realm of theater projector innovation, integrates their advanced engineering into the D-ILA series to ensure unparalleled native contrast and picture quality. The JVC DLA series incorporates HDR and frame adapt technologies to elevate HDR content, bringing out the dynamic ranges in every scene. For instance, their projectors offer various picture modes, allowing you to personalize your viewing experience depending on your preference, such as maximizing brightness or enhancing color accuracy.The Benefits of Laser Home Projectors
While traditional projectors use lamps as their light source, the laser projector brings a whole new level of efficiency and longevity. With the escent laser technology integrated into JVC models, users benefit from reduced power consumption and extended projector lifespan. This means fewer replacements and adjustments over time, which is crucial for maintaining continuous home theater enjoyment. Plus, laser projectors often exhibit stronger consistency in light output—measured in ANSI lumens—resulting in a steady, clear picture even in variable lighting conditions. For further insights into the advanced technologies behind your home theater options, explore the intersection of technology and quality by checking out this Panasonic PR-VZ570 projector breakdown.Identifying Fuse Issues
Detecting Possible Fuse Malfunctions
Understanding when your projector might be experiencing fuse-related issues is key to maintaining its optimal performance. Here are some common signs to watch for:- Power Fluctuations: If your JVC D-ILA projector fails to power on or turns off unexpectedly, the issue might stem from a blown fuse. Consistent power supply interruptions can directly impact the projector's dynamic brightness and picture quality.
- Dimmed Light Output: A sudden decline in brightness or an inability to switch between the projector modes, such as HDR or frame adapt mode, could point towards a degraded fuse affecting the power circuit.
- No Picture Display: If your JVC DLA or laser home projector experiences a blackout despite the power being on, this could hint at a fuse malfunction, interrupting the transfer of power to the lamp and lens system.
Safety Precautions Before Replacement
Take Essential Precautions to Ensure Safety
Before diving into the detailed process of replacing the fuse in your JVC D-ILA projector, it's crucial to prioritize safety aspects. Projectors, whether they utilize a lamp or laser as their light source, involve electrical components that could pose risks if handled improperly. Here are a few key points to consider:
- Power Off and Unplug: Always make sure that the projector is powered off and unplugged from the electricity outlet. Cutting off the power helps prevent electric shock and ensures your safety when dealing with the projector's internal components.
- Wait for the Projector to Cool: D-ILA projectors, just like many other projector types, including laser and escent laser models, can generate significant heat, especially when in dynamic mode or projecting HDR content. Allow the projector to cool down for at least 30 minutes to avoid burns.
- Use the Right Tools: Have necessary tools like screwdrivers and anti-static wrist straps at hand to ensure compliance with safety standards and to avoid damaging sensitive electronics within the projector.
- Prevent Static Damage: Wear an anti-static wristband to protect the projector's internal circuits from static electricity, which could negatively impact picture quality, brightness, and other critical features such as native contrast and adaptive HDR capabilities.
- Work on a Stable Surface: Ensure you're working on a flat, stable surface. This helps prevent accidental drops or falls that might damage other projector components, such as the lens or JVC DLA assembly.
Understanding and following these safety measures is essential not only for your protection but also to maintain your projector's optimal performance. For further insights into managing projector hardware, consider exploring the world of portable screen projectors where similar safety tips are also applicable.
Step-by-Step Fuse Replacement Guide
Gathering Necessary Tools and Materials
Before you dive into replacing the fuse in your D-ILA home theater projector, ensure you have all the necessary tools and materials at hand. This will streamline the process and prevent any unnecessary delays. You'll need a screwdriver set, a replacement fuse that matches the specifications of your JVC DLA projector, and a soft cloth to handle delicate parts.
Powering Down and Unplugging
Safety is paramount when dealing with electrical components. Begin by switching off the projector and unplugging it from the power source. This step is crucial to avoid any risk of electric shock or damage to the projector. Allow the device to cool down if it has been in use, as components like the lamp and lens can retain heat.
Accessing the Fuse Compartment
With your tools ready, locate the fuse compartment on your projector. This is typically found at the back or bottom of the unit. Use the appropriate screwdriver to carefully remove the panel covering the fuse. Keep the screws in a safe place to avoid losing them.
Removing the Faulty Fuse
Once the compartment is open, identify the faulty fuse. It's usually a small glass tube with metal ends. Gently remove it using your fingers or a pair of tweezers if necessary. Inspect the fuse for any visible signs of damage, such as a broken filament or discoloration.
Installing the New Fuse
Take the new fuse and carefully place it into the fuse holder. Ensure it fits snugly and securely. Double-check that the specifications of the new fuse match those required by your JVC ILA projector to maintain optimal picture quality and performance.
Reassembling and Testing
After installing the new fuse, replace the panel and secure it with the screws you set aside earlier. Plug the projector back into the power source and switch it on. Test the projector by running it in different modes, such as HDR or dynamic mode, to ensure that the brightness, contrast, and color settings are functioning correctly. If the projector powers on and operates smoothly, your fuse replacement was successful.
By following these steps, you can effectively replace the fuse in your D-ILA home theater projector, ensuring it continues to deliver excellent picture quality and performance for your home theater setup.
Choosing the Right Replacement Fuse
Selecting an Appropriate Fuse
When replacing the fuse in your D-ILA home theater projector, such as those models from JVC, it's important to choose the right type to maintain optimal performance. The fuse is crucial for protecting the power components in your projector, ensuring they don't get overloaded and cause damage. Here are key factors to consider:
- Compatibility: Always refer to your projector’s manual to understand the specific requirements for your model. JVC DLA projectors might require a particular amperage and voltage for the fuse. Using a non-compatible fuse can lead to power issues or malfunction of the dynamic light source.
- Type: Projectors using laser technology, like the JVC ILA models, might have different requirements compared to traditional lamp projectors. It's crucial to ensure that the fuse type is suitable for a high-brightness laser or lamp system.
- Brand and Quality: Opt for fuses from reputable brands to ensure reliability and safety. Low-quality fuses can affect the native contrast and brightness, impacting picture quality while watching HDR content or enjoying your home theater setup.
Finding the right replacement fuse is integral to maintaining the dynamic picture quality of your projector, preserving the brightness, and ensuring the power components work efficiently. Proper maintenance will also help prolong the life of the projector, allowing you to enjoy your home theater experience with optimum light, color, and sharpness.
Maintaining Your Projector for Longevity
Ensuring Your Projector Delivers Top Performance Long-Term
Maintaining your home theater projector, such as the JVC DLA model, is crucial to enjoy continuous stellar picture quality and safeguard your investment. Here are a few tips to maximize your projector's lifespan and maintain its stunning performance.- Regular Cleaning: Dust particles can accumulate on your projector's lens, affecting its brightness and image clarity. Regularly clean the lens and the exterior, being cautious with the sensitive optical components.
- Ventilation: Ensure adequate airflow around your projector. Overheating can diminish the performance, especially in laser projectors, affecting the dynamic contrast and HDR mode capabilities.
- Lamp Care: If your D-ILA projector uses a lamp rather than a laser, monitor the lamp's usage. Most models, such as those featuring Blu Escent Laser, come with lamp indicators to alert you when replacements are necessary.
- Power Management: Proper power management can protect your projector's electrical components. Using surge protectors can prevent power surges, a common cause of damage in theater projectors.
- Picture Settings Adjustment: Adjusting the picture mode settings can not only enhance the viewing experience but also conserve the projector’s energy over time. Experiment with different modes to find what best suits your hdr content, taking advantage of native contrast and ansi lumens features.
- Firmware Updates: Regularly check for software updates provided by JVC or your projector manufacturer. These updates can offer improvements in features like Frame Adapt HDR and color reproduction.
- Usage Conditions: Limit environmental stress by maintaining a stable room temperature and avoiding excessive humidity. This ensures the laser components and other internal mechanisms function optimally.